
REVIEW · KYOTO NINJA EXPERIENCES
Kyoto: Forge Your Own Ninja Weapon with Japanese Tin Casting
A few Kyoto activities let you pour molten metal into a mold, then carry home the finished piece in its own box. Here, you make a small tin shuriken, kunai, or oni mask from start to finish, with staff guiding each step. I like the real hands-on work and the fact that your souvenir carries your own fingerprints in its shape and finish.
I also like the easy location, just a three-minute walk from Demachiyanagi Station, and the patient help from instructors such as Daiki. The main consideration is time: shuriken and kunai take about two hours, while the oni mask can take 150 minutes, and finishing metal by hand may be more work than some families expect.
In This Review
- Key points to know before you book
- Why this Kyoto craft class feels different
- Getting to the studio near Demachiyanagi Station
- Choosing between a shuriken, kunai, and oni mask
- Making the mold with casting sand
- Watching tin melt at 230 degrees Celsius
- Cooling, hammering, and filing your new weapon
- The final oil treatment and dedicated box
- Why the oni mask takes longer
- Is $103 good value for two hours of craft work?
- Who will get the most from the workshop?
- Practical details that affect your day
- Should you book the Kyoto ninja casting class?
- FAQ
- Where is the ninja casting workshop located?
- How long does the activity take?
- Which designs can I make?
- Is the workshop available in English?
- Can children take part?
- What should I bring?
Key points to know before you book
- You cast the metal yourself: Staff supervise the pour, but you take part in making the mold, shaping the casting, filing it smooth, and applying the final treatment.
- Three designs give the class different levels of detail: Pick a shuriken, choose the optional kunai upgrade, or spend longer on the larger oni mask.
- The tin melts at 230 degrees Celsius: It is workable for beginners, but this is still a hot-metal class, so follow every instruction carefully.
- Your finished piece measures about 8 to 10 centimeters: It is a compact souvenir rather than a full-size prop, and it comes with a dedicated box.
- Daiki and the other instructors help in English and Japanese: The activity is designed for beginners, with extra assistance available for children.
- Bring a drink: Water is not provided, and food, alcohol, smoking, and drugs are not allowed in the studio.
Why this Kyoto craft class feels different
Kyoto is full of beautiful things to look at, but much of sightseeing here asks you to remain an observer. This workshop changes the balance. You are not simply buying a ninja-themed souvenir or posing with a prop. You help create one from a blank mold and a lump of tin.
The process is the appeal. You make a mold in casting sand, watch tin become liquid, pour it under supervision, cool the metal in water, and then spend time refining its surface. The finished object is small, but the sequence gives it weight as a memory. I find that more satisfying than picking up another factory-made trinket at a station shop.
The class also offers a gentle introduction to Japanese metalwork. You will not become a professional caster in one session, and the workshop does not claim to teach a full trade. Still, you get a clear look at the basic logic of casting: create a negative shape, fill it with liquid metal, allow it to solidify, and clean up the result by hand.
More ninja experiences:
- Skip the lines Basic Ticket at SAMURAI NINJA MUSEUM KYOTO
★ 4.5 · 632 reviews - Ninja 1-hour Hands-on Lesson by Japanese master in Kyoto -Entry
★ 5.0 · 489 reviews - Kyoto: Ninja Weapon Forging Experience
★ 4.8 · 478 reviews
Getting to the studio near Demachiyanagi Station
The studio is three minutes on foot from Demachiyanagi Station. That short walk matters in Kyoto, where a craft class can otherwise become an awkward detour between temples, shopping streets, and train lines.
Check the available start times when booking, then allow a little extra time to find the studio and settle in. The class has several stages, and completion times can vary. A shuriken or kunai generally takes about two hours. The oni mask takes around two and a half hours because it involves more finishing work, gold leaf, and a cord.
Wear something suitable for practical work. An apron is provided, as are the tools and materials, but you should expect to handle casting sand, files, and finishing equipment. Bring water or another nonalcoholic drink since none is supplied.
The activity is available in English and Japanese. The staff can explain the process clearly to international visitors, and the class is set up so that beginners can follow along rather than arrive with metalworking skills.
Choosing between a shuriken, kunai, and oni mask
Your first decision shapes the whole class.
The shuriken is the standard choice for a compact ninja souvenir. Its form is familiar, its size stays within the stated 8 to 10 centimeters, and the work gives you a clear route from mold to finished object. If you want the shortest version of the class, this is likely the sensible pick.
The kunai, described as a ninja knife, is an optional upgrade. It offers a different shape and a little more detail than the basic choice. You should select it when the form matters more to you than keeping the price at the base rate. The supplied price is $103 per person, but the optional kunai and oni mask upgrades may cost extra, so check the exact total before paying.
The oni mask is also an optional upgrade and takes roughly 150 minutes. This is the most decorative choice. After casting and surface work, you can add gold leaf and choose a cord, making the result suitable to wear or display. The extra time is not just a longer wait. It gives you more finishing decisions and a more elaborate object to take home.
If you are booking for a family or group of friends, letting each person choose a different design can make the session more fun. You can compare the castings as they move through the same process, while each final piece develops its own look through filing and polishing.
Making the mold with casting sand
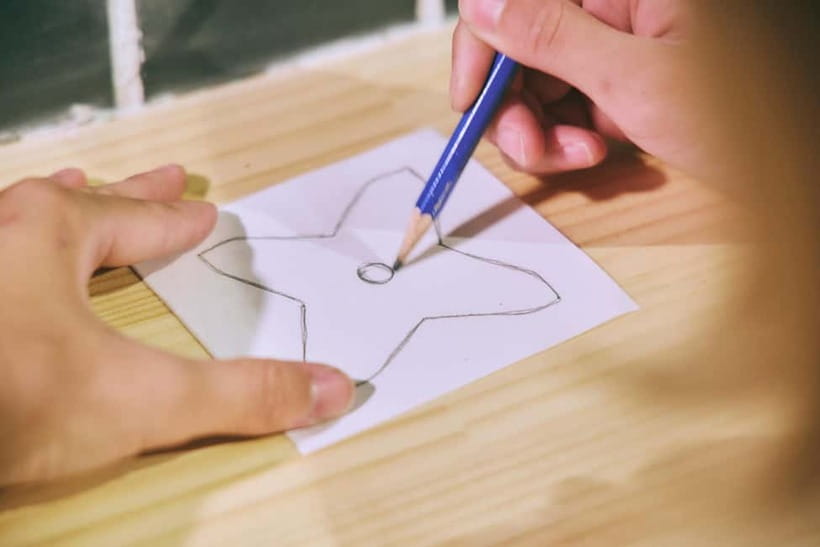
The class begins with design selection and mold making. You form a detailed mold from special casting sand, and this is where the outline of your object is decided.
This stage deserves patience. A mold is not just a container. Its shape determines what the molten tin can reach and how clean the final casting will look. Staff help you understand what to do, which makes the task manageable even if you have never worked with a casting mold.
For children, this may be the most technical part of the class. The activity is suitable for children with staff assistance, but anyone under 15 must be accompanied by a guardian. Children under five are not suitable for the experience, and babies under one are excluded as well.
You should expect a real craft process rather than a quick paint-and-take-home activity. If you rush the sand work, you may create more filing later. That is not a disaster, since cleanup is part of the class, but careful preparation makes the later stages easier.
A completely different side of Kyoto:
- PERFECT KYOTO 1-Day Bus Tour
★ 5.0 · 13,518 reviews - Kyoto: Fushimi Inari, Kinkakuji, Bamboo Grove 1 Day Bus Tour
★ 4.8 · 4,316 reviews - Kyoto: Tea Ceremony in a Traditional Tea House in Kiyomizu
★ 4.9 · 3,519 reviews - Kyoto Geisha Walking Tour: Gion District & Hidden Gems
★ 4.7 · 3,273 reviews
Watching tin melt at 230 degrees Celsius
Once the mold is ready, solid tin is heated until it becomes molten at about 230 degrees Celsius. Staff supervise the hot-metal work, and you follow their directions as you pour the liquid into your mold.
The temperature is lower than that required for some other metals, and tin is relatively easy to work with. That does not mean you should treat the pour casually. This remains a metal casting activity, and the workshop rules are sensible: no smoking, no food, no alcohol or drugs, and no making fire.
The best part is that the transformation is visible and immediate. You start with a solid material, watch it become liquid, and then see the shape emerge after cooling. Staff involvement keeps the process controlled while still letting you feel responsible for the object you are making.
Photos and videos are available as part of the experience, giving you a way to record the pour and the work around it. Since the class has a strong visual element, take advantage of those moments, but do not let the camera distract you from instructions during the hot stages.
Cooling, hammering, and filing your new weapon
After the pour, the metal is cooled in water. It solidifies quickly, and the next phase shifts from heat to hand finishing.
You shape the casting by hammering, then smooth it with a file. This is the point at which your piece begins to look less like a rough casting and more like a finished object. It is also where the experience becomes personal. Two people can use the same design and produce pieces with slightly different surfaces and edges.
The tools are supplied, and the instructors offer tips as you work. Reviews of the class repeatedly highlight patient, clear guidance, including help from Daiki and his colleague. That matters because filing metal is simple to understand but easy to overdo. A little guidance can save you from removing too much material or leaving an awkward rough patch.
Expect the work to be hands-on. You may need to spend time on small imperfections, and the final polish will depend partly on your care. If you want a perfectly uniform, machine-finished object, buy one in a shop. If you want a souvenir that shows you made it, the hand finishing is the point.
The final oil treatment and dedicated box
When the surface is shaped and smoothed, the piece is soaked in a rust-preventive solution and coated with a special oil. This treatment protects the metal and gives it a finished appearance.
The steps may sound minor, but they complete the process. Without surface treatment, the casting would feel like an unfinished workshop sample. The oil helps turn your work into a proper keepsake.
Every weapon comes with a dedicated box. That is useful for carrying it through the rest of your Japan trip and for storing it at home. The compact 8 to 10 centimeter size also makes packing easier than a large souvenir, though you should still keep it safely packed in your luggage rather than carrying it loosely.
The finished object is a display piece and a personal memento. The activity does not present it as a full-size combat tool, and its small scale is part of what makes it practical to take home.
Why the oni mask takes longer
The oni mask adds a second layer of decoration after the main casting and finishing work. You can apply gold leaf for a dramatic accent, then choose and attach a cord.
That cord gives you a choice in how to use the mask. You can make it wearable or prepare it for display. The gold leaf also creates a more ornate result than the simpler weapon designs, but it adds decisions and time.
I would choose the mask if you enjoy decorative crafts and do not mind spending the full 150 minutes in the studio. It is less suited to a tightly timed sightseeing day. Kyoto plans can look neat on paper, but a class that runs long by a little can affect trains, meals, and evening reservations.
For a birthday, a family activity, or a special souvenir, the mask can justify the extra cost and time. For a quick afternoon project, the shuriken is the safer choice.
Is $103 good value for two hours of craft work?
At $103 per person, this is not a cheap souvenir purchase. You are paying for instruction, a workspace, an apron, equipment, casting materials, metal treatment, and a take-home piece. The price makes more sense when you value the making process as much as the object.
A regular souvenir gives you speed and certainty. This class gives you time, instruction, and a story attached to the item. You also get to work through several real stages instead of decorating a pre-made object.
The value improves for people who want an activity that works across ages. The class has received strong praise for helping adults and children in the same session, including families with children around seven, nine, and ten. A guardian must accompany anyone under 15, so parents should expect to take part rather than simply wait nearby.
The price may feel high if you are mainly searching for a small ninja gift. In that case, compare the cost with other paid craft workshops and decide if two hours of guided work fits your Kyoto budget. I would not book this only because the finished item looks cool. Book it because you want to make it.
Who will get the most from the workshop?
This is a good match for you if you like Japanese culture, hands-on projects, or unusual souvenirs. Ninja and samurai fans will get the obvious visual appeal, but you do not need to know much about ninja history to enjoy the class.
Families can use it as a shared activity. The staff can assist children, and the process gives younger participants several jobs to focus on. Adults should be ready to help with attention, safety, and patience, especially during mold making and filing.
Couples and friends can make contrasting designs and compare the finish. Solo participants may also find the format comfortable. One session became a one-on-one class, which allowed relaxed conversation and extra tips about things to do in Kyoto and Osaka. Group size is not specified, so do not book with the assumption that you will receive a private session.
This is less suitable if you dislike workshop mess, have very little time, or want a purely passive cultural activity. It also may not suit anyone who cannot comfortably follow hot-metal safety directions or use the provided tools.
Practical details that affect your day
The class lasts about two hours for a shuriken or kunai and about two and a half hours for an oni mask. Allow flexibility around the scheduled end, since completion times can vary.
English and Japanese instruction is offered. Equipment, materials for one weapon, and an apron are included. Water is not included, so bring a drink. Food, smoking, alcohol, drugs, and personal fire-making are not allowed.
You can cancel up to 24 hours in advance for a full refund, and the reserve-now, pay-later option lets you hold a place without paying immediately. Check the available start time and current upgrade price before confirming.
The location near Demachiyanagi Station makes this easier to fit into a Kyoto itinerary than a workshop far outside the main sightseeing routes. Still, plan the class as a fixed appointment, not as a casual stop between two temples.
Should you book the Kyoto ninja casting class?
Book it if you want a souvenir you helped create, not just something you picked up. The strongest reasons are the full process, the patient instruction, the easy station access, and the chance to leave with a boxed 8 to 10 centimeter piece of your own work.
Choose the shuriken for a straightforward two-hour session. Pay the extra for the kunai if you prefer its shape, or choose the oni mask when gold leaf, a cord, and a longer decorative project appeal to you.
Skip it if $103 feels too high for a craft class, if your Kyoto schedule cannot spare two to two and a half hours, or if you want a polished store-bought item with no work involved. For everyone else, this is a memorable way to spend part of a Kyoto day, especially for families, birthday outings, and anyone who wants a conversation-starting souvenir with a real making story behind it.
FAQ
Where is the ninja casting workshop located?
The studio is a three-minute walk from Demachiyanagi Station in Kyoto.
How long does the activity take?
Making a shuriken or kunai takes approximately two hours. The oni mask takes approximately two and a half hours, or 150 minutes. Completion times can vary.
Which designs can I make?
You can choose a shuriken, a kunai, or an oni-inspired metal mask. The kunai and oni mask are optional upgrades.
Is the workshop available in English?
Yes. Instruction is available in English and Japanese.
Can children take part?
The activity is suitable for beginners and children with staff assistance. Anyone under 15 must be accompanied by a guardian. Children under five are not suitable for the activity.
What should I bring?
Bring a drink because water is not provided. An apron, equipment, and the materials for one weapon are included.
Recently added around Kyoto
- Higashiyama | Kyoto: Sakura Season Private Rickshaw Tour★ 5.0 · 3 reviews
- Kyoto Kimono Rental CHAMATSU|Kimono/Yukata Rental FamilyPlan★ 5.0 · 3 reviews
- Nara Private Customizable Half Day Tour★ 5.0 · 3 reviews
- Kyoto: Half-Day Private Guided Tour to the Old Town of Gion★ 4.4 · 3 reviews
- Kansai Region Hiking Adventure in Nara Kobe Kyoto and More★ 5.0 · 3 reviews
- Full Day Nara Deer, Temple, Shrine, Activities & Tea Ceremony★ 5.0 · 3 reviews
- Nara: Essential Private Tour with Deer Park and Temples★ 5.0 · 3 reviews
- Hiking Tour for Sacred Sites in Kyoto with a Guide★ 5.0 · 3 reviews
Kyoto Ninja Experiences, compared.
Skip the lines Basic Ticket at SAMURAI NINJA MUSEUM KYOTO
Read our review →
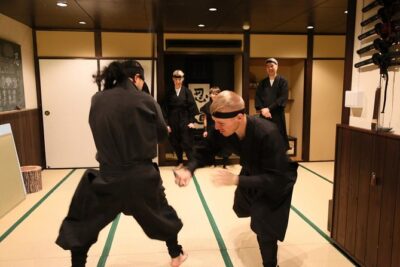
Ninja 1-hour Hands-on Lesson by Japanese master in Kyoto -Entry
Read our review →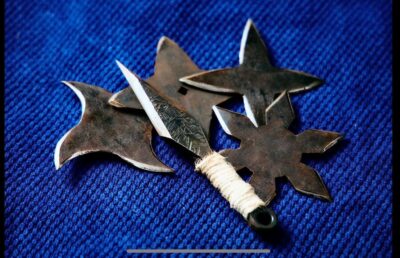
Ninja 2-hour Hands-on Lesson by Japanese master in Kyoto -Medium
Read our review →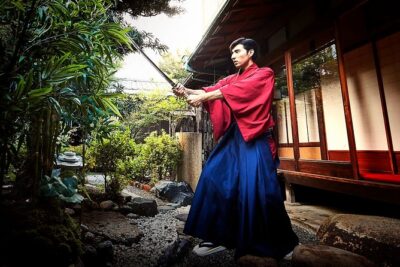
Kyoto Sword Experience – includes Museum Ticket/Ninja Experience
Read our review →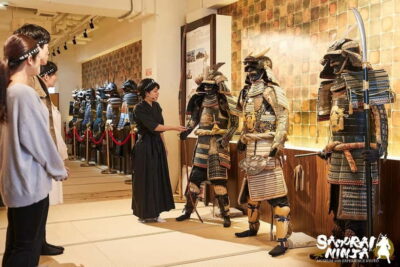
Ninja Experience (Family Friendly) at Samurai Ninja Museum KYOTO
Read our review →
Authentic Ninja Weapon Forging Experience in Kyoto
Read our review →Browse the lists this tour appears in